1. What is combinational circuit ?

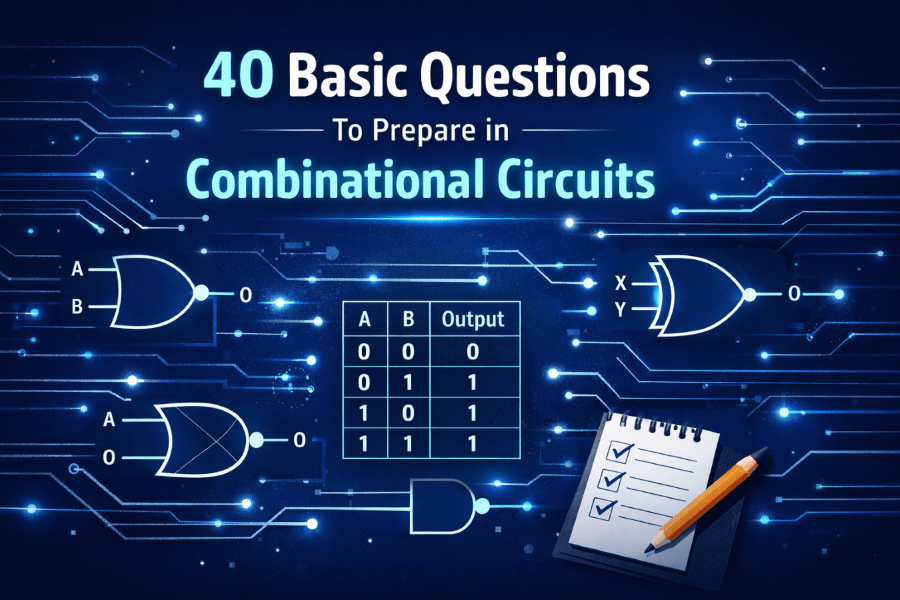
A combinational circuit is an electronic circuit in which the output of the circuit is a function of the current inputs only, and not of the past inputs or outputs. This means that the output of a combinational circuit depends only on the current state of its inputs, and not on any previous input or output states.


Combinational circuits are commonly used to perform logical operations, such as AND, OR, and NOT, on binary inputs. They are also used to implement digital circuits that perform arithmetic operations, such as addition and subtraction, and to implement digital circuits that perform data manipulation, such as data encoding and decoding.


Combinational circuits can be designed using a variety of electronic components, such as logic gates, multiplexers, and decoders. They can be implemented using discrete electronic components, such as transistors and resistors, or using integrated circuits, such as logic gates and multiplexers.
Combinational circuits are an important part of digital electronics and are widely used in a variety of applications, including computer systems, communication systems, and control systems.

2. Difference between combinational & sequential circuits ?

Combinational circuits and sequential circuits are two types of digital circuits that are used to perform different types of operations.


Combinational circuits are digital circuits in which the output of the circuit is a function of the current inputs only, and not of the past inputs or outputs. This means that the output of a combinational circuit depends only on the current state of its inputs, and not on any previous input or output states.


Sequential circuits, on the other hand, are digital circuits in which the output of the circuit is a function of both the current inputs and the previous inputs and outputs. This means that the output of a sequential circuit depends on both the current state of its inputs and its previous states.


One of the main differences between combinational circuits and sequential circuits is that combinational circuits do not have memory, while sequential circuits have memory. This means that combinational circuits cannot store information about past inputs or outputs, while sequential circuits can store this information in the form of flip-flops or other types of memory elements.


Another difference between combinational circuits and sequential circuits is that combinational circuits are typically faster than sequential circuits, since they do not have the overhead of storing and retrieving data from memory. However, sequential circuits are more versatile than combinational circuits, since they can perform a wider range of operations, including data storage, data manipulation, and decision making.


Combinational circuits are commonly used to perform logical operations, such as AND, OR, and NOT, on binary inputs, and to implement digital circuits that perform arithmetic operations, such as addition and subtraction. Sequential circuits, on the other hand, are commonly used to implement digital circuits that perform data manipulation, such as data encoding and decoding, and to implement digital circuits that perform decision making, such as controllers and finite state machines.

3. What are universal gates?

Universal gates are logic gates that can be used to implement any Boolean function. A Boolean function is a mathematical function that takes one or more binary inputs (either 0 or 1) and produces a single binary output (either 0 or 1).

There are three types of logic gates that are considered to be universal gates:


1.    NAND gates: NAND gates are logic gates that implement the NOT-AND function. They can be used to implement any Boolean function by using a combination of NAND gates and inverters.

2.    NOR gates: NOR gates are logic gates that implement the NOT-OR function. They can be used to implement any Boolean function by using a combination of NOR gates and inverters.

3.    XOR gates: XOR gates are logic gates that implement the exclusive-OR function. They can be used to implement any Boolean function by using a combination of XOR gates, AND gates, OR gates, and inverters.

Universal gates are widely used in digital electronics, since they can be used to implement a wide variety of logic functions. They are commonly used in the design of digital circuits, such as computers, communication systems, and control systems.
 

4. Which logic gate is used more in real-life applications?

In real-life applications, all three types of universal gates (NAND gates, NOR gates, and XOR gates) are used extensively. However, the specific type of gate that is used most frequently can vary depending on the specific application.


One reason that NAND gates are commonly used in real-life applications is that they can be used to implement any Boolean function using only NAND gates and inverters. This means that a circuit can be implemented using only NAND gates, which simplifies the design process and reduces the number of components required.


NOR gates are also commonly used in real-life applications, particularly in applications where low-power consumption is a concern. NOR gates consume less power than NAND gates, since they require less current to switch between the two states.


XOR gates are commonly used in real-life applications where it is necessary to perform exclusive-OR operations. They are often used in error detection and correction circuits, as well as in digital circuits that perform data manipulation, such as data encoding and decoding.


Overall, the specific type of logic gate that is used most frequently in real-life applications can vary depending on the specific requirements of the application. All three types of universal gates are important tools in the design of digital circuits, and are widely used in a variety of applications, including computers, communication systems, and control systems.

5. What are the applications of Buffer?

Buffers are digital circuits that are used to isolate one circuit from another, or to drive multiple loads from a single source. They are commonly used in a variety of applications, including:


1.     Isolating circuits: Buffers can be used to isolate one circuit from another, preventing one circuit from affecting the operation of another circuit. This can be useful in situations where two circuits operate at different voltage levels, or where one circuit is sensitive to noise or interference.


2.     Driving multiple loads: Buffers can be used to drive multiple loads from a single source, allowing a single signal to be distributed to multiple destinations. This can be useful in situations where a single signal needs to be sent to multiple devices, such as in a bus system.


3.     Amplifying signals: Buffers can be used to amplify weak signals, allowing them to be transmitted over longer distances or to drive larger loads.


4.     Level shifting: Buffers can be used to level shift signals, converting a signal from one voltage level to another. This can be useful in situations where two circuits operate at different voltage levels, or where a signal needs to be transmitted over a long distance.


5.     Clock distribution: Buffers can be used to distribute clock signals in digital systems, allowing multiple devices to synchronize their operations.


Overall, buffers are an important component in a wide variety of digital circuits, and are commonly used in applications where it is necessary to isolate, amplify, or distribute signals.

6. Realize the equation Y=AB+C using only 2 input NAND gates 

To realize the equation Y=AB+C using only 2-input NAND gates, you can use the following steps:
1. Convert the equation to its canonical form: The first step is to convert the equation to its canonical form, which is a sum of products. In this case, the equation can be written as Y = AB + C.


2. Implement the AND function using NAND gates: To implement the AND function using NAND gates, you can use a NAND gate with both inputs tied together. This is known as a NOT-AND gate, or a NAND gate with inverted inputs.


3. Implement the OR function using NAND gates: To implement the OR function using NAND gates, you can use two NAND gates arranged in a particular configuration. Specifically, you can use a NAND gate with one input tied to the other input, and the other input connected to the input of another NAND gate. This is known as a NOT-OR gate, or a NAND gate with inverted outputs.


4. Connect the NAND gates to realize the equation: To realize the equation Y=AB+C using NAND gates, you can connect the NAND gates as follows:


   Connect the output of a NAND gate with both inputs tied together to one input         of another NAND gate. This will implement the AND function.
   Connect the output of a NAND gate with one input tied to the other input to the second input of the second NAND gate. This will implement the OR function.
   Connect the output of the second NAND gate to the output Y.


This will implement the equation Y=AB+C using only 2-input NAND gates.

7. Realize XOR gate using only 2 input NOR gates

To realize an XOR gate using only 2-input NOR gates, you can use the following steps:


1. Implement the AND function using NOR gates: To implement the AND function using NOR gates, you can use two NOR gates arranged in a particular configuration. Specifically, you can use a NOR gate with one input tied to the other input, and the other input connected to the input of another NOR gate. This is known as a NOT-AND gate, or a NOR gate with inverted outputs.


2.  Implement the OR function using NOR gates: To implement the OR function using NOR gates, you can use a NOR gate with both inputs tied together. This is known as a NOT-OR gate, or a NOR gate with inverted inputs.


3.  Connect the NOR gates to realize the XOR function: To realize the XOR function using NOR gates, you can connect the NOR gates as follows:


4.  Connect the output of a NOR gate with one input tied to the other input to one input of a NOR gate with both inputs tied together. This will implement the AND function.


5.  Connect the output of a NOR gate with both inputs tied together to the second input of the NOR gate with both inputs tied together. This will implement the OR function.


6.  Connect the output of the NOR gate with both inputs tied together to the output of the XOR gate.


This will implement an XOR gate using only 2-input NOR gates.

8. Implement a NOT gate using the XOR gate

A NOT gate is a logic gate that inverts the input signal. It has a single input and a single output, and its output is the logical negation (inversion) of its input. To implement a NOT gate using an XOR gate, you can follow these steps:


     1. Connect the input of the NOT gate to one input of the XOR gate.
     2. Connect a constant value of 1 to the second input of the XOR gate.
     3. Connect the output of the XOR gate to the output of the NOT gate.

This will implement a NOT gate using an XOR gate. The XOR gate will invert the input signal, since it produces a 1 output when its inputs are different, and a 0 output when its inputs are the same. The constant value of 1 ensures that the inputs to the XOR gate are always different, so the XOR gate will always produce an inverted output.


For example, if the input to the NOT gate is 0, the XOR gate will receive a 0 on one input and a 1 on the other input, and will therefore produce a 1 on the output. If the input to the NOT gate is 1, the XOR gate will receive a 1 on one input and a 1 on the other input, and will therefore produce a 0 on the output.


Overall, implementing a NOT gate using an XOR gate is a simple and effective way to invert a digital signal.

9. Explain the difference between NAND and negative input AND gate

NAND gates and negative input AND gates are two types of logic gates that are used to perform different types of logical operations.


NAND gates are logic gates that implement the NOT-AND function. They have two or more inputs and a single output, and their output is the logical negation (inversion) of the AND function applied to their inputs. NAND gates are often used as universal gates, since they can be used to implement any Boolean function by using a combination of NAND gates and inverters.


Negative input AND gates, also known as NOT-AND gates or NAND gates with inverted inputs, are logic gates that have two or more inputs and a single output, and their output is the AND function applied to their inputs with one of the inputs inverted. Negative input AND gates are similar to NAND gates, but differ in the way that the AND function is implemented.


One main difference between NAND gates and negative input AND gates is the way that they perform logical operations. NAND gates perform the NOT-AND function, while negative input AND gates perform the AND function with one of the inputs inverted. This means that the output of a NAND gate will be the logical negation of the AND function applied to its inputs, while the output of a negative input AND gate will be the AND function applied to its inputs with one of the inputs inverted.


Another difference between NAND gates and negative input AND gates is the way that they are used in digital circuits. NAND gates are commonly used as universal gates, since they can be used to implement any Boolean function. Negative input AND gates are not as commonly used as NAND gates, but can be useful in certain situations where it is necessary to perform the AND function with one of the inputs inverted.

10. Explain the differences between MOSFETs and BJTs, and why we use MOSFET in digital design.

MOSFETs (Metal-Oxide-Semiconductor Field-Effect Transistors) and BJTs (Bipolar Junction Transistors) are two types of transistors that are commonly used in electronics. Both types of transistors are used to amplify and switch electrical signals, but they have some important differences that make them suitable for different types of applications.


One main difference between MOSFETs and BJTs is the way that they are constructed and operate. MOSFETs are constructed using three layers of material: a metal layer, an oxide layer, and a semiconductor layer. The metal layer is called the gate, the oxide layer is called the gate oxide, and the semiconductor layer is called the substrate. MOSFETs operate by using the electric field between the gate and the substrate to control the flow of current through the transistor.


BJTs, on the other hand, are constructed using three layers of material: a p-type layer, an n-type layer, and an n-type layer. The p-type layer is called the base, the n-type layer is called the emitter, and the n-type layer is called the collector. BJTs operate by using the flow of current through the base to control the flow of current between the emitter and the collector.


Another difference between MOSFETs and BJTs is the way that they are used in electronic circuits. MOSFETs are commonly used in digital circuits, particularly in applications where low power consumption is a concern. They are also used in high-frequency circuits, since they have a low input impedance and are able to switch signals quickly.


BJTs are commonly used in analog circuits, where they are used to amplify signals. They are also used in high-power circuits, since they are able to handle large currents and voltages.


Overall, MOSFETs and BJTs are both important components in electronic circuits, and are used in a variety of applications. MOSFETs are commonly used in digital circuits, while BJTs are commonly used in analog circuits.

11. Draw 2 input NAND & NOR gates using CMOS logic

Pick diagrams from Google but here’s the explanation


The PMOS transistors are used to pull the output high, and the NMOS transistors are used to pull the output low.
In the 2-input NAND gate, the output is pulled high by the PMOS transistors when both inputs are low, and is pulled low by the NMOS transistors when either input is high. This implements the NOT-AND function, which is the NAND function.


In the 2-input NOR gate, the output is pulled low by the NMOS transistors when both inputs are high, and is pulled high by the PMOS transistors when either input is low. This implements the NOT-OR function, which is the NOR function.


Overall, CMOS logic is a widely used type of digital logic that is based on the use of PMOS and NMOS transistors. It is commonly used in the design of digital circuits, particularly in applications where low power consumption is a concern.

12. What are pull-up & pull-down networks?

Pull-up and pull-down networks are circuits that are used to set the logical level of an electronic signal. They are commonly used in digital circuits to ensure that a signal is at a defined logical level when it is not being actively driven.


A pull-up network is a circuit that is used to pull the logical level of a signal high. It is typically used in digital circuits to ensure that a signal is at a logical 1 level when it is not being actively driven. A pull-up network is typically implemented using a resistor connected between the signal and a positive power supply voltage.


A pull-down network is a circuit that is used to pull the logical level of a signal low. It is typically used in digital circuits to ensure that a signal is at a logical 0 level when it is not being actively driven. A pull-down network is typically implemented using a resistor connected between the signal and ground.


Pull-up and pull-down networks are commonly used in digital circuits to ensure that a signal is at a defined logical level when it is not being actively driven. This can be important in situations where the signal is used to control the operation of other circuits, or where the signal needs to be stable in order to avoid errors or malfunction.


Overall, pull-up and pull-down networks are important components in digital circuits, and are widely used to ensure that signals are at a defined logical level when they are not being actively driven.

13. Explain the operation of the CMOS Inverter

A CMOS inverter is a digital logic gate that performs logical negation on its input signal. It has two stable states, which are designated as “logic high” (representing a logical 1) and “logic low” (representing a logical 0).
 
The operation of a CMOS inverter is based on the use of two complementary types of MOSFETs (Metal-Oxide-Semiconductor Field-Effect Transistors), one n-type and one p-type. The n-type MOSFET is used to conduct current when its source-drain channel is in the “on” state, while the p-type MOSFET is used to block current when its channel is in the “on” state.
 
When the input signal to the inverter is logic high, the n-type MOSFET is turned on and the p-type MOSFET is turned off, allowing current to flow through the n-type MOSFET and producing a logic low output. Conversely, when the input signal is logic low, the p-type MOSFET is turned on and the n-type MOSFET is turned off, blocking current flow and producing a logic high output.
 
This complementary action of the two MOSFETs allows the CMOS inverter to switch between its two stable states rapidly, making it a useful building block for digital circuits. It also has the advantage of low power consumption, as the MOSFETs only draw significant current when they are switching between their on and off states.

14. Draw the VTC curve of the CMOS Inverter

The VTC (Voltage Transfer Characteristic) curve of a CMOS inverter is a graph that shows the relationship between the input voltage and the output voltage of the inverter. The VTC curve is useful for understanding the behavior of the CMOS inverter and for predicting its output for different input voltages.
The VTC curve of a CMOS inverter is typically a straight line that slopes downward from left to right. The slope of the curve depends on the specific design of the inverter and can be affected by factors such as the size and type of the MOS transistors that are used to implement the inverter.
The slope of the VTC curve can be positive, negative, or zero. A positive slope indicates that the output voltage increases as the input voltage increases. A negative slope indicates that the output voltage decreases as the input voltage increases. A zero slope indicates that the output voltage is constant and does not change as the input voltage changes.
The VTC curve of a CMOS inverter typically has a negative slope, which means that the output voltage decreases as the input voltage increases. This is because the CMOS inverter is designed to invert the input signal, so the output voltage is the logical negation of the input voltage.
Overall, the VTC curve of a CMOS inverter is a useful tool for understanding the behavior of the inverter and for predicting its output for different input voltages. It is an important consideration in the design of digital circuits that use CMOS inverters.

15. Explain about half adder

A half adder is a digital circuit that is used to perform the addition of two binary digits (bits). It has two inputs, called A and B, and two outputs, called sum (S) and carry (C). The sum output represents the sum of the two input bits, while the carry output represents the carry-over bit that is generated when the sum exceeds 1.

The half adder is implemented using two XOR gates and an AND gate. The XOR gates are used to generate the sum output, while the AND gate is used to generate the carry output. The operation of the half adder can be understood by considering the truth table below:
A  B  S  C
0  0  0  0
0  1   1  0
1   0  1  0
1   1   0  1
In the truth table, A and B are the inputs to the half adder, S is the sum output, and C is the carry output. The half adder produces a sum output of 0 when both inputs are 0 or when both inputs are 1, and produces a sum output of 1 when one input is 0 and the other input is 1. The half adder produces a carry output of 1 only when both inputs are 1.
 

Overall, the half adder is a simple and important digital circuit that is widely used in the design of digital systems. It is commonly used as the building block for more complex adder circuits, such as full adders and carry lookahead adders.

16. Design an OR gate using half adders

To design an OR gate using half adders, you can follow these steps:
1.     Connect the inputs of the OR gate to the inputs of two half adders: The OR gate has two inputs, A and B, which are connected to the inputs of two half adders.


2.     Connect the sum outputs of the half adders to the output of the OR gate: The OR gate has a single output, which is connected to the sum outputs of the two half adders.


3.     Connect the carry outputs of the half adders to the sum input of a third half adder: The carry outputs of the two half adders are connected to the sum input of a third half adder.


4.     Connect the output of the third half adder to the output of the OR gate: The output of the third half adder is connected to the output of the OR gate.


This design uses three half adders to implement an OR gate. The OR gate produces a 1 output when either of its inputs is 1, and a 0 output when both of its inputs are 0. This behavior is implemented by the half adders, which produce a sum output of 1 when either of their inputs is 1, and a sum output of 0 when both of their inputs are 0. The third half adder is used to OR the carry outputs of the first two half adders, which ensures that the

17. Design a Full adder using only NAND gates

A full adder is a digital circuit that performs the addition of two binary numbers and a carry-in bit. It has three inputs: A, B, and Cin, and two outputs: Sum and Cout.
 
Here is a possible implementation of a full adder using only NAND gates:
 
  A   B   Cin  Sum  Cout
— — —- —- —-
 0   0    0    0    0
 0   0    1    1    0
 0   1    0    1    0
 0   1    1    0    1
 1   0    0    1    0
 1   0    1    0    1
 1   1    0    0    1
 1   1    1    1     1
 
To implement the full adder, we can use the following Boolean expressions:
 
Sum = A NAND B NAND Cin
Cout = (A NAND B) NAND (Cin NAND (A NAND B))

18. In how many ways, a full adder can be implemented using logic gates?

A Full Adder can be implemented using a variety of different logic gates, including AND gates, OR gates, XOR gates, and NAND gates. Some possible ways to implement a Full Adder using these logic gates are:
1.     Using AND, OR, and XOR gates: A Full Adder can be implemented using a combination of AND gates, OR gates, and XOR gates. The sum bit can be computed using an XOR gate, and the carry bit can be computed using an AND gate.


2.     Using NAND gates: A Full Adder can also be implemented using only NAND gates, as described in the previous answer.


3.     Using AND and OR gates: A Full Adder can also be implemented using a combination of AND and OR gates. The sum bit can be computed using an XOR gate, and the carry bit can be computed using an AND gate.


4.     Using AND and XOR gates: A Full Adder can also be implemented using a combination of AND and XOR gates. The sum bit can be computed using an XOR gate, and the carry bit can be computed using an AND gate.


In general, there are many ways to implement a Full Adder using different types of logic gates, and the choice of which gates to use will depend on the specific design requirements and constraints of the circuit.

19. Draw the Full subtractor truth table & circuit

A Full Subtractor is a digital circuit that performs the subtraction of two binary numbers and a borrow-in bit. It has three inputs and two outputs. The inputs are the two binary numbers to be subtracted (A and B) and a borrow-in bit (Bin). The outputs are the difference of the subtraction (D) and a borrow-out bit (Bout).


The truth table for a Full Subtractor is shown below:
A    B    Bin  D  Bout
0    0    0      0   0
0    1     0     1    0
1     0    0     1    0
1     1     0     0   1
0     0    1     1    0
0     1     1     0   1
1     0     1     0   1
1     1      1     1   1
The Full Subtractor computes the difference of the two binary inputs (A and B) and the borrow-in bit (Bin) and produces the difference (D) and borrow-out bit (Bout) as the outputs.


For example, when A = 1, B = 0, and Bin = 0, the Full Subtractor computes D = 1 and Bout = 0, indicating that the difference of A and B is 1 and no borrow is needed.


On the other hand, when A = 1, B = 1, and Bin = 0, the Full Subtractor computes D = 0 and Bout = 1, indicating that the difference of A and B is 0 and a borrow is needed.

20. Difference between Ripple Carry Adder and Carry Look Ahead Adder

A Ripple Carry Adder (RCA) is a digital circuit that performs the addition of two or more binary numbers. It consists of a chain of Full Adders, with the carry-out bit of one Full Adder serving as the carry-in bit for the next Full Adder. The final carry-out bit is the carry-out bit for the entire addition.


A Carry Look Ahead Adder (CLA) is also a digital circuit that performs the addition of two or more binary numbers. However, it is designed to be faster than a Ripple Carry Adder by reducing the delay caused by the ripple of carries through the chain of Full Adders. It does this by using a special logic circuit called a Carry Look Ahead Generator to compute the carry bits for the addition in parallel, rather than sequentially as in a Ripple Carry Adder.


The main difference between a Ripple Carry Adder and a Carry Look Ahead Adder is the way in which they compute the carry bits for the addition. A Ripple Carry Adder computes the carry bits sequentially, while a Carry Look Ahead Adder computes the carry bits in parallel using a Carry Look Ahead Generator. This makes a Carry Look Ahead Adder faster than a Ripple Carry Adder, especially for large numbers of bits. However, a Carry Look Ahead Adder is also more complex and requires more logic gates than a Ripple Carry Adder.

21. Design a logical circuit that performs both addition and subtraction

To design a logical circuit that performs both addition and subtraction, we can use a half adder and a full adder.


A half adder is a logical circuit that performs the following operations:


  Given two input bits, A and B, it produces a sum bit, S, and a carry bit, C.
The truth table for a half adder is as follows:
A B S C
0 0 0 0
0 1  1 0
1  0 1 0
1  1 0 1
The logic equations for a half adder are as follows:
S = A xor B C = A and B


A full adder is a logical circuit that performs the following operations:


  Given two input bits, A and B, and a carry bit, Cin, it produces a sum bit, S, and a carry bit, Cout.
The truth table for a full adder is as follows:
A  B  Cin  S  Cout
0  0   0     0  0
0  0   1      1  0
0  1   0      1  0
0  1   1      0  1
1   0  0      1  0
1   0  1       0 1
1   1   0     0  1
1   1   1      1   1

The logic equations for a full adder are as follows:


S = (A xor B) xor Cin Cout = (A and B) or (Cin and (A xor B))

To perform addition, we can chain together full adders to add two N-bit numbers. For example, to add two 4-bit numbers, we can use four full adders, with the carry bit from one full adder serving as the carry input for the next full adder.


To perform subtraction, we can use the same full adder circuit, but we must take the 2’s complement of the subtrahend (the number being subtracted). The 2’s complement of a number is obtained by inverting all of its bits (i.e., changing 0s to 1s and 1s to 0s) and then adding 1. For example, the 2’s complement of 1011 is 0100.


Once we have taken the 2’s complement of the subtrahend, we can simply add it to the minuend (the number from which we are subtracting) using the full adder circuit. The result will be the difference of the two numbers.


For example, to subtract the 4-bit number 1011 from the 4-bit number 1100, we first take the 2’s complement of 1011, which is 0100. Then, we add 0100 to 1100 using the full adder circuit, which gives us the result 0001. The result is the difference of the two numbers.

22. What is a comparator?

A comparator is a logical circuit that compares two input values and produces a single output indicating whether the first input is greater than, less than, or equal to the second input.


A comparator can be implemented using a variety of logical gates, such as AND gates, OR gates, and NOT gates.


There are several types of comparators, including:


   Magnitude comparator: This type of comparator compares the magnitudes (i.e., absolute values) of two input values and produces an output indicating which value is larger.


    Sign comparator: This type of comparator compares the signs (i.e., positive or negative) of two input values and produces an output indicating whether the values have the same sign or different signs.


     Equality comparator: This type of comparator compares two input values and produces an output indicating whether the values are equal or not equal.


In general, a comparator takes two input values, A and B, and produces an output indicating the relationship between A and B.


The output can be represented using various forms, such as a single bit (e.g., 1 if A is greater than B, 0 if A is less than or equal to B), multiple bits (e.g., 00 if A is less than B, 01 if A is equal to B, and 10 if A is greater than B), or a voltage level (e.g., a high voltage if A is greater than B, a low voltage if A is less than or equal to B).

23. Differences between Encoder and Decoder

An encoder is a digital circuit that converts a set of input values into a unique output code. An encoder typically has multiple input lines and fewer output lines.


A decoder is a digital circuit that converts a unique input code into a set of output values. A decoder typically has fewer input lines and multiple output lines.


There are several differences between encoders and decoders:
1.     Function: An encoder converts a set of input values into a unique output code, whereas a decoder converts a unique input code into a set of output values.


2.     Input and output lines: An encoder typically has multiple input lines and fewer output lines, whereas a decoder has fewer input lines and multiple output lines.


3.     Number of input and output values: An encoder has fewer output values than input values, whereas a decoder has fewer input values than output values.


4.     Applications: Encoders are commonly used to compress data, whereas decoders are used to expand data.


For example, consider a 3-to-8 line encoder and a 8-to-3 line decoder. The encoder has three input lines and eight output lines. It converts a unique combination of three input values into a unique 8-bit output code. The decoder has eight input lines and three output lines. It converts a unique 8-bit input code into a unique combination of three output values.

24. Applications of Encoder & Decoder

Encoders and decoders have a wide range of applications in digital systems and electronics. Some common applications of encoders and decoders are:


1.     Data compression: Encoders are commonly used to compress data by converting a set of input values into a shorter, more efficient output code. This can be useful in situations where data needs to be transmitted or stored efficiently.


2.     Data expansion: Decoders are used to expand data by converting a unique input code into a set of output values. This can be useful when data needs to be expanded for further processing or display.


3.     Data multiplexing: Encoders and decoders can be used to multiplex (i.e., combine) and demultiplex (i.e., separate) data streams. For example, an encoder can be used to multiplex multiple data streams into a single output stream, and a decoder can be used to demultiplex the single stream back into the original streams.


4.     Error detection and correction: Encoders and decoders can be used in error detection and correction systems to detect and correct errors that may occur during data transmission or storage.


5.     Data security: Encoders and decoders can be used to secure data by converting it into an encoded form that is difficult to decipher without the proper decoder.

25. Design 4 to 16 decoders using 2 to 4 decoders

To design a 4:16 decoder using 2:4 decoders, you will need to cascade two 2:4 decoders together. A decoder is a combinational logic circuit that converts a binary code to a set of output signals.


A 2:4 decoder has two input lines and four output lines, and it converts a two-bit binary code to a four-bit output code.


Here is one way to design a 4:16 decoder using two 2:4 decoders:
1.     Connect the two input lines of the first 2:4 decoder to the four most significant bits (MSBs) of the 4-bit input code.


2.     Connect the four output lines of the first 2:4 decoder to the four input lines of the second 2:4 decoder.


3.     Connect the two input lines of the second 2:4 decoder to the four least significant bits (LSBs) of the 4-bit input code.


4.     Connect the four output lines of the second 2:4 decoder to the four most significant bits of the 4-bit output code.


This design will allow you to decode a 4-bit input code into a 16-bit output code, with each output bit corresponding to one of the 16 possible combinations of the 4-bit input code.


For example, if the 4-bit input code is “0110”, the first 2:4 decoder will decode the MSBs “01” into the output code “0100”, and the second 2:4 decoder will decode the LSBs “10” into the output code “0010”. The final output code will be “010010”, which corresponds to the sixth combination of the 4-bit input code.

26. What is a priority encoder?

A priority encoder is a combinational logic circuit that converts a set of input signals into a unique binary code, with the priority given to the input signal that has the highest priority. The output code is a binary representation of the input signal with the highest priority.


A priority encoder has n input lines and m output lines, where m is the number of bits needed to represent all the possible input combinations. For example, if a priority encoder has 8 input lines, it will need 3 output lines to represent all the possible input combinations.


The input lines are usually labeled with a priority value, with the highest priority given to the input line with the lowest label. For example, if the input lines are labeled 0 to 7, the input line with label 0 has the highest priority, and the input line with label 7 has the lowest priority.


When multiple input signals are active (logic 1), the priority encoder will output the binary code corresponding to the input signal with the highest priority. If no input signals are active (all input signals are logic 0), the priority encoder will output a predefined code, usually all zeros.


Priority encoders are commonly used in digital circuits to select one of several input signals based on the priority of the input signals. They are often used in interrupt handling circuits, where the priority encoder is used to determine the highest priority interrupt request that needs to be serviced.

27. What is a Multiplexer? Applications of MUX

A multiplexer (MUX) is a digital circuit that selects one of several input signals and routes it to a single output line. It has multiple input lines, a single output line, and a set of control lines that determine which input signal is selected.


A multiplexer is often abbreviated as MUX, and is also known as a data selector.
Multiplexers are widely used in digital systems to route data from multiple sources to a single destination. They are commonly used to select between different input signals, such as data from different memory locations or different input ports.


Some common applications of multiplexers include:
1.   Data routing: Multiplexers are often used to route data from different sources to a common bus or data path.


2.  Signal selection: Multiplexers can be used to select between different input signals, such as data from different memory locations or different input ports.


3.  Data decoding: Multiplexers can be used to decode a binary code into a set of output signals.


4. Interrupt handling: Multiplexers can be used to select the highest priority interrupt request in an interrupt handling circuit.


5.   Control signals: Multiplexers can be used to select between different control signals in a digital circuit.


6.  Communication systems: Multiplexers are commonly used in communication systems to select between different channels or data streams.


Multiplexers can be implemented using digital logic gates or as part of a larger integrated circuit. They are an important component in many digital systems, and are used in a wide range of applications, from simple logic circuits to complex computer systems.

28. Why MUX is called a universal circuit?

A multiplexer (MUX) is called a universal circuit because it can be used to implement any Boolean function. A Boolean function is a mathematical function that takes in one or more Boolean inputs (logic 0 or 1) and produces a single Boolean output.


A multiplexer has multiple input lines, a single output line, and a set of control lines that determine which input signal is selected. By properly setting the control lines, a multiplexer can be made to implement any Boolean function.


For example, suppose we have a 2-to-1 multiplexer with two input lines A and B, a single output line F, and a single control line C. The truth table for this multiplexer is shown below:
C   A  B  F
0   0  0  0
0   0  1  0
0   1   0  1
0   1  1   1
1    0  0  0
1    0  1   1
1    1   0  0
1   1    1   1


As we can see, the multiplexer can be made to implement any Boolean function of two variables by setting the control line C appropriately.


For example, to implement the AND function, we can set C to 0, which will cause the multiplexer to select the first input line A when both input lines are 0, and to select the second input line B when either input line is 1.


In this way, a multiplexer can be used to implement any Boolean function by properly setting the control lines, making it a universal circuit.

29. Design 4:1 MUX using 2:1 MUX

To design a 4:1 multiplexer (MUX) using 2:1 MUXs, you will need to cascade two 2:1 MUXs together. A multiplexer is a digital circuit that selects one of several input signals and routes it to a single output line. A 2:1 MUX has two input lines and a single output line, and it selects one of the two input signals based on the value of a control line.


Here is one way to design a 4:1 MUX using two 2:1 MUXs:
1. Connect the four input lines of the 4:1 MUX to the two input lines of the first 2:1 MUX and the two input lines of the second 2:1 MUX.


2. Connect the control line of the first 2:1 MUX to the most significant bit (MSB) of the 2-bit control code.


3. Connect the control line of the second 2:1 MUX to the least significant bit (LSB) of the 2-bit control code.


4. Connect the output line of the first 2:1 MUX to the input line of the second 2:1 MUX.


5. Connect the output line of the second 2:1 MUX to the output line of the 4:1 MUX.


This design will allow you to select one of the four input signals based on the 2-bit control code. For example, if the 2-bit control code is “00”, the first 2:1 MUX will select the first input line, and the second 2:1 MUX will pass this signal to the output line. If the 2-bit control code is “01”, the first 2:1 MUX will select the second input line, and the second 2:1 MUX will pass this signal to the output line. And so on.


You can also design a 4:1 MUX using a single 4:1 MUX integrated circuit, which will have four input lines, a single output line, and a 2-bit control line. This will be a simpler and more efficient design than cascading two 2:1 MUXs together.

30. Design logic gates (AND, OR, NOT, NAND, NOR, XOR) using 2:1 MUX

A multiplexer (MUX) is a digital circuit that selects one of several input signals and routes it to a single output line. It has multiple input lines, a single output line, and a set of control lines that determine which input signal is selected.


Here is how you can design the following logic gates using a 2:1 multiplexer (MUX):


1. AND gate: To implement an AND gate using a 2:1 MUX, set the control line to 0 and connect the first input line to the second input line. The output of the MUX will be the AND of the two input lines.


2. OR gate: To implement an OR gate using a 2:1 MUX, set the control line to 1 and connect the first input line to the second input line. The output of the MUX will be the OR of the two input lines.


3. NOT gate: To implement a NOT gate using a 2:1 MUX, set the control line to 1 and connect the first input line to the inverse of the second input line. The output of the MUX will be the NOT of the second input line.


4. NAND gate: To implement a NAND gate using a 2:1 MUX, set the control line to 0 and connect the first input line to the inverse of the second input line. The output of the MUX will be the NAND of the two input lines.


5. NOR gate: To implement a NOR gate using a 2:1 MUX, set the control line to 1 and connect the first input line to the inverse of the second input line. The output of the MUX will be the NOR of the two input lines.


6. XOR gate: To implement an XOR gate using a 2:1 MUX, set the control line to the second input line and connect the first input line to the inverse of the second input line. The output of the MUX will be the XOR of the two input lines.
Note that these designs will only implement the desired logic gate for a single input combination.

To implement a multi-input logic gate, you will need to use multiple 2:1 MUXs and combine their outputs using additional logic gates.

31. How many 2:1 MUX are required to design 64:1 MUX?

To design a 64:1 multiplexer (MUX) using 2:1 MUXs, you will need to cascade 32 2:1 MUXs together. A multiplexer is a digital circuit that selects one of several input signals and routes it to a single output line. A 2:1 MUX has two input lines and a single output line, and it selects one of the two input signals based on the value of a control line.


Here is how you can design a 64:1 MUX using 32 2:1 MUXs:


      1.Connect the 64 input lines of the 64:1 MUX to the two input lines of each of the 32 2:1 MUXs.


     2.Connect the control lines of the 2:1 MUXs to the 6-bit control code, with the control line of the first 2:1 MUX connected to the most significant bit (MSB) and the control line of the last 2:1 MUX connected to the least significant bit (LSB).


    3.Connect the output lines of the 2:1 MUXs in a cascading fashion, with the output line of each 2:1 MUX connected to the input line of the next 2:1 MUX.


   4.Connect the output line of the last 2:1 MUX to the output line of the 64:1 MUX.


This design will allow you to select one of the 64 input signals based on the 6-bit control code.

For example, if the 6-bit control code is “000000”, the first 2:1 MUX will select the first input line, and the output of the last 2:1 MUX will be the same as the first input line. If the 6-bit control code is “000001”, the first 2:1 MUX will select the second input line, and the output of the last 2:1 MUX will be the same as the second input line. And so on.


You can also design a 64:1 MUX using a single 64:1 MUX integrated circuit, which will have 64 input lines, a single output line, and a 6-bit control line. This will be a simpler and more efficient design than cascading 32 2:1 MUXs together.

32. Realize 2 input AND gate using 4:1 MUX

To realize a 2-input AND gate using a 4:1 multiplexer (MUX), you can use the following design:


1.Set the control lines of the 4:1 MUX to 0.


2.Connect the first input line of the AND gate to the first input line of the MUX.


3.Connect the second input line of the AND gate to the second input line of the MUX.


4.Connect the third input line of the MUX to the first input line of the AND gate.


5.Connect the fourth input line of the MUX to the second input line of the AND gate.


This design will implement the AND function of the two input lines using the 4:1 MUX. When both input lines are 0, the MUX will select the third input line, which is also 0, and the output of the MUX will be 0. When either input line is 1, the MUX will select the fourth input line, which is also 1, and the output of the MUX will be 1. Therefore, the output of the MUX will be the AND of the two input lines.


Note that this design will only implement the AND gate for a single input combination. To implement the AND gate for all possible input combinations, you will need to use additional logic gates or a larger MUX.

33. Implement 2 input NOR gate using 1:2 DEMUX

To implement a 2-input NOR gate using a 1:2 demultiplexer (DEMUX), you can use the following design:


1.  Set the control line of the 1:2 DEMUX to the output of the NOR gate.


2. Connect the first input line of the NOR gate to the input line of the DEMUX.


3. Connect the second input line of the NOR gate to the inverse of the input line of the DEMUX.


4. Connect the first output line of the DEMUX to the inverse of the second input line of the NOR gate.


5. Connect the second output line of the DEMUX to the second input line of the NOR gate.


This design will implement the NOR function of the two input lines using the 1:2 DEMUX. When both input lines are 0, the control line of the DEMUX will be 1, and the DEMUX will select the second output line, which is also 1.


The output of the NOR gate will be the inverse of this signal, which is 0. When either input line is 1, the control line of the DEMUX will be 0, and the DEMUX will select the first output line, which is also 0. The output of the NOR gate will be the inverse of this signal, which is 1. Therefore, the output of the NOR gate will be the NOR of the two input lines.


Note that this design will only implement the NOR gate for a single input combination. To implement the NOR gate for all possible input combinations, you will need to use additional logic gates or a larger DEMUX.

34. Implement a full adder using 4:1 Muxes

A full adder is a digital circuit that performs the addition of two binary digits (bits) and a carry-in bit, and produces a sum bit and a carry-out bit. It is used to add two binary numbers, and is an important component in many digital circuits.


To implement a full adder using 4:1 multiplexers (MUXes), you can use the following design:


1.Connect the first input line of the full adder to the first input line of the first 4:1 MUX.


2.Connect the second input line of the full adder to the second input line of the first 4:1 MUX.


3.Connect the carry-in line of the full adder to the third input line of the first 4:1 MUX.


4.Connect the first input line of the second 4:1 MUX to the output line of the first 4:1 MUX.


5.Connect the second input line of the second 4:1 MUX to the carry-in line of the full adder.


6.Connect the third input line of the second 4:1 MUX to the inverse of the carry-in line of the full adder.


7.Connect the fourth input line of the second 4:1 MUX to the inverse of the output line of the first 4:1 MUX.


8.Connect the output line of the second 4:1 MUX to the sum line of the full adder.


9.Connect the third input line of the first 4:1 MUX to the fourth input line of the second 4:1 MUX.


This design will implement the full adder using the two 4:1 MUXes. The first MUX will compute the sum of the two input bits and the carry-in bit, and the second MUX will compute the carry-out bit based on the sum and the carry

35. Explain tri-state buffers (notif1, notif0, bufif1, bufif0)

Tri-state buffers are electronic components that are used to control the flow of data in a circuit. They are used in a variety of applications, including digital logic, data transmission, and memory design.


Tri-state buffers have three possible states: high, low, and high impedance. The high and low states correspond to the logical values of 1 and 0, respectively. The high impedance state is a third state in which the buffer appears to be disconnected from the circuit, allowing other components to drive the signal.


There are two types of tri-state buffers: notif1 and notif0 buffers, and bufif1 and bufif0 buffers.


Notif1 and notif0 buffers are inverting tri-state buffers. Notif1 buffers have a single input and a single output. When the input is high, the output is low. When the input is low, the output is high. Notif0 buffers are the opposite: when the input is high, the output is high, and when the input is low, the output is low.


Bufif1 and bufif0 buffers are non-inverting tri-state buffers. Bufif1 buffers have a single input and a single output. When the input is high, the output is also high. When the input is low, the output is also low. Bufif0 buffers are the opposite: when the input is high, the output is low, and when the input is low, the output is high.


Tri-state buffers are used in circuits to control the flow of data between different components. They are often used in combination with other components, such as multiplexers and demultiplexers, to control the flow of data in complex circuits.

36. Implement basic gates (AND, OR, NOT) using tri-state buffers

Tri-state buffers can be used to implement basic gates, such as AND, OR, and NOT gates.


To implement an AND gate using tri-state buffers, you can use a combination of notif1 and notif0 buffers. The notif1 buffer has a single input and a single output. When the input is high, the output is low. When the input is low, the output is high.


To implement an AND gate, you can connect the inputs of the notif1 buffer to the inputs of the AND gate, and connect the output of the notif1 buffer to the output of the AND gate. When both inputs are high, the output will be low. When either input is low, the output will be high.


To implement an OR gate using tri-state buffers, you can use a combination of notif1 and bufif1 buffers. The notif1 buffer has a single input and a single output. When the input is high, the output is low. When the input is low, the output is high. The bufif1 buffer has a single input and a single output. When the input is high, the output is also high. When the input is low, the output is also low.


To implement an OR gate, you can connect the inputs of the notif1 buffer and the bufif1 buffer to the inputs of the OR gate, and connect the outputs of the notif1 and bufif1 buffers to the output of the OR gate. When both inputs are low, the output will be low. When either input is high, the output will be high.


To implement a NOT gate using a tri-state buffer, you can use a notif1 buffer. The notif1 buffer has a single input and a single output. When the input is high, the output is low. When the input is low, the output is high.


To implement a NOT gate, you can connect the input of the notif1 buffer to the input of the NOT gate, and connect the output of the notif1 buffer to the output of the NOT gate. When the input is high, the output will be low. When the input is low, the output will be high.

37. Design a 4:1 MUX using tri-state buffers

A multiplexer (MUX) is a digital logic component that selects one of several input signals and routes it to a single output. A 4:1 MUX has four inputs and one output, and it selects one of the four inputs to be routed to the output based on the values of the selection inputs.


To design a 4:1 MUX using tri-state buffers, you can use a combination of notif1 and bufif1 buffers. The notif1 buffer has a single input and a single output. When the input is high, the output is low. When the input is low, the output is high. The bufif1 buffer has a single input and a single output. When the input is high, the output is also high. When the input is low, the output is also low.


Here is a possible implementation of a 4:1 MUX using tri-state buffers:


Inputs:
  I0: first input
  I1: second input
  I2: third input
  I3: fourth input
  S0: first selection input
  S1: second selection input
Output:
   O: output
   Tri-state buffers:
    B1: bufif1 buffer
    B2: bufif1 buffer
    B3: bufif1 buffer
    B4: notif1 buffer


The inputs I0, I1, I2, and I3 are connected to the inputs of the four tri-state buffers B1, B2, B3, and B4, respectively. The output of each tri-state buffer is connected to the output O.


The selection inputs S0 and S1 are used to control which of the four inputs is routed to the output. The truth table below shows the values of S0 and S1 and the corresponding input that is routed to the output:


S1 S0  Input routed to output
0   0    I0
0   1     I1
1    0    I2
1    1     I3
To implement this truth table, you can use the following logic:


  When S1 is low and S0 is low, both B1 and B4 are enabled, and the other two buffers are disabled. This causes I0 to be routed to the output.


  When S1 is low and S0 is high, both B2 and B4 are enabled, and the other two buffers are disabled. This causes I1 to be routed to the output.


  When S1 is high and S0 is low, both B3 and B4 are enabled, and the other two buffers are disabled. This causes I2 to be routed to the output.


  When S1 is high and S0 is high, all four buffers are enabled. This causes I3 to be routed to the output.


To enable or disable a tri-state buffer, you can use the control input of the buffer. When the control input is high, the buffer is enabled and can pass the input signal to the output. When the control input is low, the buffer is disabled and the output is in a high impedance state, allowing other components to drive the signal.

38. Design a 2:1 MUX using decoder & tri-state buffers

A multiplexer (MUX) is a digital logic component that selects one of several input signals and routes it to a single output. A 2:1 MUX has two inputs and one output, and it selects one of the two inputs to be routed to the output based on the value of the selection input.


To design a 2:1 MUX using a decoder and tri-state buffers, you can use a decoder to convert the selection input into control signals for the tri-state buffers. A decoder is a digital logic component that converts a binary input into a number of output signals.


Here is a possible implementation of a 2:1 MUX using a decoder and tri-state buffers:
Inputs:
  I0: first input
  I1: second input
  S: selection input
Output:
  O: output
Decoder:
  D: 2-to-4 decoder
Tri-state buffers:
  B1: bufif1 buffer
  B2: notif1 buffer


The inputs I0 and I1 are connected to the inputs of the two tri-state buffers B1 and B2, respectively. The output of each tri-state buffer is connected to the output O.


The selection input S is connected to the input of the decoder D. The decoder has four outputs, which are used to control the tri-state buffers B1 and B2.
The truth table below shows the values of S and the corresponding input that is routed to the output:
S Input routed to output
0 I0
1  I1


To implement this truth table, you can use the following logic:
  When S is low, the decoder D generates low signals on all its outputs. This causes both tri-state buffers B1 and B2 to be enabled, allowing I0 to be routed to the output.


  When S is high, the decoder D generates a low signal on one output and high signals on the other outputs. This causes tri-state buffer B2 to be enabled and tri-state buffer B1 to be disabled, allowing I1 to be routed to the output.


To enable or disable a tri-state buffer, you can use the control input of the buffer.

  When the control input is high, the buffer is enabled and can pass the input signal to the output.

  When the control input is low, the buffer is disabled and the output is in a high impedance state, allowing other components to drive the signal.

39. Design a combinational circuit that converts a 4-bit gray code number to a 4-bit binary number using only XOR gates

Gray code is a type of binary code in which consecutive numbers differ by only one bit. It is often used in digital systems to minimize the number of transitions between adjacent numbers, which can reduce the potential for errors.


To design a combinational circuit that converts a 4-bit gray code number to a 4-bit binary number using only XOR gates, you can use the following logic:
 1. The first bit of the binary number is the same as the first bit of the gray code number.


 2. The second bit of the binary number is obtained by XORing the first and second bits of the gray code number.


  3. The third bit of the binary number is obtained by XORing the second and third bits of the gray code number.


  4. The fourth bit of the binary number is obtained by XORing the third and fourth bits of the gray code number.

Here is a possible implementation of the combinational circuit using XOR gates:
Inputs:
 G0: first bit of the gray code number
 G1: second bit of the gray code number
 G2: third bit of the gray code number
 G3: fourth bit of the gray code number
Outputs:
 B0: first bit of the binary number
 B1: second bit of the binary number
 B2: third bit of the binary number
 B3: fourth bit of the binary number


 XOR gates:
 X1: first XOR gate
 X2: second XOR gate
 X3: third XOR gate
 X4: fourth XOR gate


The inputs G0, G1, G2, and G3 are connected to the inputs of the XOR gates X1, X2, X3, and X4, respectively. The outputs of the XOR gates are connected to the outputs B0, B1, B2, and B3, respectively.


The first bit of the binary number B0 is obtained by connecting the input G0 to the output B0.


The second bit of the binary number B1 is obtained by XORing the first and second bits of the gray code number using XOR gate X1. The inputs of XOR gate X1 are G0 and G1, and the output is B1.


The third bit of the binary number B2 is obtained by XORing the second and third bits of the gray code number using XOR gate X2. The inputs of XOR gate X2 are G1 and G2, and the output is B2.


The fourth bit of the binary number B3 is obtained by XORing the third and fourth bits of the gray code number using XOR gate X3. The inputs of XOR gate X3 are G2 and G3, and the output is B3.

40. Design a combinational circuit, that doubles the input frequency. (Frequency multiplier by 2)

A frequency multiplier is a combinational circuit that multiplies the input frequency by a factor of n, where n is an integer. To design a frequency multiplier that doubles the input frequency, you can use a divide-by-2 counter and an XOR gate.
Here is a possible implementation of a frequency multiplier that doubles the input frequency:
Input:
   CLK: input clock signal
Output:
   Q: output clock signal
Components:
   D1: divide-by-2 counter
   X: XOR gate
The input clock signal CLK is connected to the input of the divide-by-2 counter D1. The output of the divide-by-2 counter is connected to one input of the XOR gate X. The other input of the XOR gate is connected to the input clock signal CLK. The output of the XOR gate is the output clock signal Q.


The divide-by-2 counter divides the input frequency by 2, and the XOR gate adds the input frequency back to the divided frequency, resulting in a frequency that is twice the input frequency.

Posted in Concepts, Design, Floorplan, IP design, Machine Learning.