Hello
Or atleast analyze full chip timing?
No…..Then get it ready soon… We will soon be launching course on static timing analysis – part 2 and physical design – part 2 that will rely heavily on open source EDA tools, which might be a bit difficult to be done in windows….
So, if you have windows, no need to format and install linux…I have a way to do it on Windows….its called ‘Virtual Box’…yayyy….
We would need linux OS to install all open source tool sets and hence get your machine ready to design and analyze a chip while you relax at your home 🙂
So this blog will focus on few steps to install virtual box and linux on your windows machine (if you have Linux machine already, then you just need to go through my courses)
You just need Two things:
– VirtualBox
This software can running Windows, Linux, Mac operating systems.
you can download it from HERE
– Linux OS ( For example Linux Mint 15 )
This is the Linux system.
you can download it from HERE
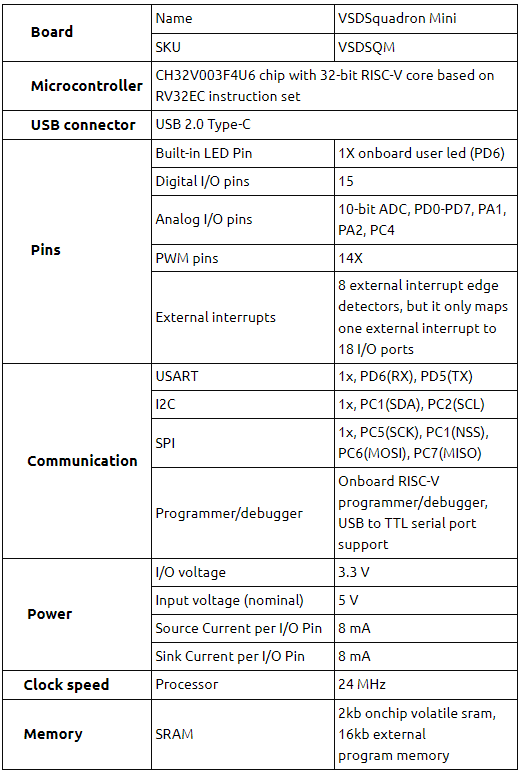
After you do that, its just a matter of following instructions coming on your screen…The below is your startup screen
– After install VirtualBox, click New.
– Write your system Name for example Linux Mint 15.
– Select Type: Linux.
– Select Version: Ubuntu.
– Write your system Name for example Linux Mint 15.
– Select Type: Linux.
– Select Version: Ubuntu.
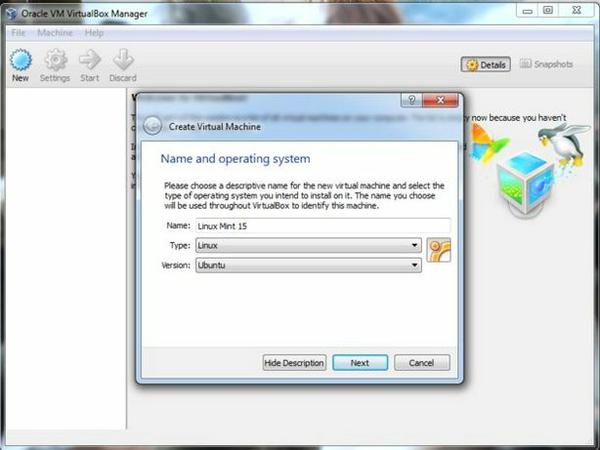
Select amount of RAM you need. To start with, you can use 1GB RAM (atleast that’s what I am using for my courses)
And, the step from here onwards are quite what you see on your screen… like
– Choose Create a virtual hard drive now, to make a virtual disk space.
– Then select the VDI to make a backup.
– Choose Dynamically allocated.
– Now select the amount of hard drive size.
– Then select the VDI to make a backup.
– Choose Dynamically allocated.
– Now select the amount of hard drive size.
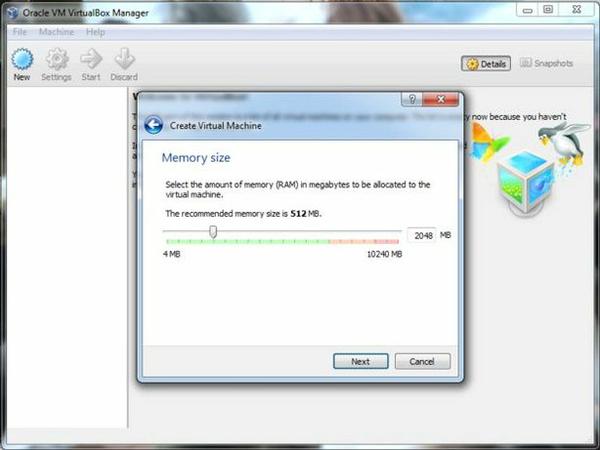
– Now we done from hardware setting.
– Click Start to launch system.
– Choose your system iso file from your computer.
for example my system iso file is (linuxmint-15-cinnamon-dvd-32bit.iso)
– Click on the Install Linux Mint.
– And select Erase disk and install Linux Mint.
– Then press Install Now.- Now make your account
– Then press Continue.
– And select Erase disk and install Linux Mint.
– Then press Install Now.- Now make your account
– Then press Continue.
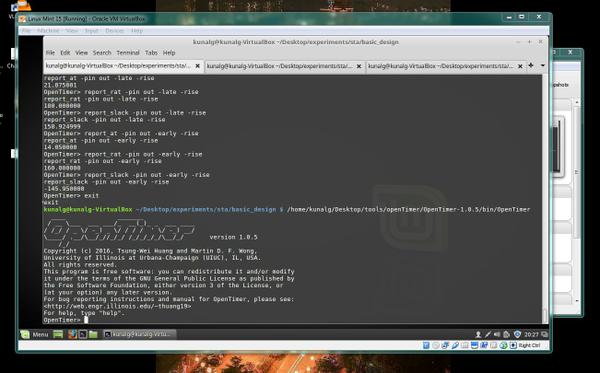
Congratulations now you have Linux on your Windows. It will look something like below (with open source tool Opentimer launched)
So, get your machine ready to design chip and with my cool courses :)?
happy learning!!